
Chrome can capture a scrolling screenshot, but the option is hidden. The quickest route with no install is the DevTools Command Menu and its “Capture full size screenshot” command. If you want a one-click capture, or the page is too complex for DevTools, a browser extension does the stitching for you. This guide covers both methods, the problems that ruin long captures, and what to do with the image afterward so people can actually respond to it.
TL;DR
- Chrome has no regular “scrolling screenshot” button. The built-in way is DevTools: open the Command Menu and run Capture full size screenshot to download one PNG of the whole page.
- DevTools works best on standard, text-heavy pages. Web apps, iframes and custom scrolling containers are where extensions usually do better.
- Scroll to the bottom first, close pop-ups and cookie banners, and hide sticky elements before you capture.
- A screenshot is only the start. For review, pin comments on the exact spot and share one link instead of emailing a huge image.
- Pinhub can capture a page from its URL or with the Pinhub Chrome extension on Pro and Team plans, then lets reviewers comment without an account.
Table of Contents
- What a scrolling screenshot is, and why Chrome hides it
- Method 1: DevTools, with nothing to install
- Method 2: A Chrome extension for one-click capture
- Quick comparison
- Fixing the problems that ruin long screenshots
- Capturing is half the job: getting feedback on the image
- Our point of view: a screenshot should start a conversation
- A practical workflow for reviewing a long page
- Which Pinhub plan covers which part of this workflow
- Try it on your next page review
- FAQ
- Sources
What a scrolling screenshot is, and why Chrome hides it
A normal screenshot captures what is visible in the window. A scrolling screenshot (also called a full-page or long screenshot) captures the whole page from top to bottom as a single image, including everything below the fold.
Chrome has offered this for years, but as a developer feature. Full-page screenshots arrived in DevTools with Chrome 59, which describes them as a screenshot of the entire page from the top of the viewport to the bottom. Later, Chrome 89 added node screenshots that include content below the fold, and made full-page captures more precise.
That history explains the experience today: the feature is solid, but you have to know where to find it.
Method 1: DevTools, with nothing to install
This is the fastest option for a one-off capture on a desktop browser. ZDNET’s 2026 walkthrough confirms you can capture a full web page in Chrome for free on desktop, and that desktop, iPhone and Android each use different built-in tools. The desktop steps are:
- Open the page you want to capture.
- Open DevTools with Ctrl+Shift+I on Windows, or Command+Option+I on a Mac.
- Open the Command Menu with Ctrl+Shift+P on Windows, or Command+Shift+P on a Mac.
- Type “screenshot”.
- Choose Capture full size screenshot.
Chrome downloads a PNG of the entire rendered page. Zapier’s guide to full-page screenshots in Chrome describes the same built-in tool as the easiest option because nothing needs to be installed. We also wrote a shorter walkthrough: save a full-page PNG in Chrome using DevTools.
When DevTools is the right choice
- You need one clean capture of an article, a landing page or a pricing page.
- You are on a locked-down work computer where you cannot add extensions.
- You want the file saved straight to disk with no account or sign-in.
Where DevTools falls short
DevTools is highly effective on standard pages, but it often struggles with complex web applications, iframes and custom scrollable containers. If your dashboard scrolls inside a panel rather than the page itself, you may get only the visible part of that panel.
It is also a multi-step process every time. If you capture pages weekly, the extra keystrokes add up, and that is where an extension earns its place.
Method 2: A Chrome extension for one-click capture
Extensions take a different approach. They scroll the page for you, record each visible region and assemble the pieces into one continuous image. That stitching handles many of the edge cases DevTools misses, such as inner scrolling areas.
What to look for in a scrolling screenshot extension:
- Permissions. Some extensions ask for access to every site you visit. Read what the Chrome Web Store listing requests before you install.
- Output format. PNG keeps text sharp. A PDF works, but ZDNET notes that images are cleaner for long, scrolling captures.
- What happens next. Some extensions only save a file. Others let you annotate or share. Decide whether you need the capture to end up in a review workflow.
- Handling of sticky elements. Headers and chat bubbles can repeat down the image, as covered below.
If your goal is feedback rather than a file, Pinhub’s own extension is built for that. The Pinhub Chrome extension captures a page into a screenshot, and Capture from URL does the same when you paste an address. Both are available on the Pro and Team plans. The result lands in your workspace ready for pinned comments, not buried in a downloads folder.
Quick comparison
| DevTools command | Browser extension | |
|---|---|---|
| Install needed | No | Yes |
| Steps per capture | Several | Usually one click or shortcut |
| Standard article or landing page | Works well | Works well |
| Web apps, iframes, inner scroll areas | Often struggles | Usually handles them better |
| Annotation and sharing | Not included | Depends on the tool |
| Best for | One-off captures | Repeated captures and review |
Fixing the problems that ruin long screenshots
Most bad scrolling screenshots fail for the same few reasons. These fixes work with either method.
Blank sections or spinners
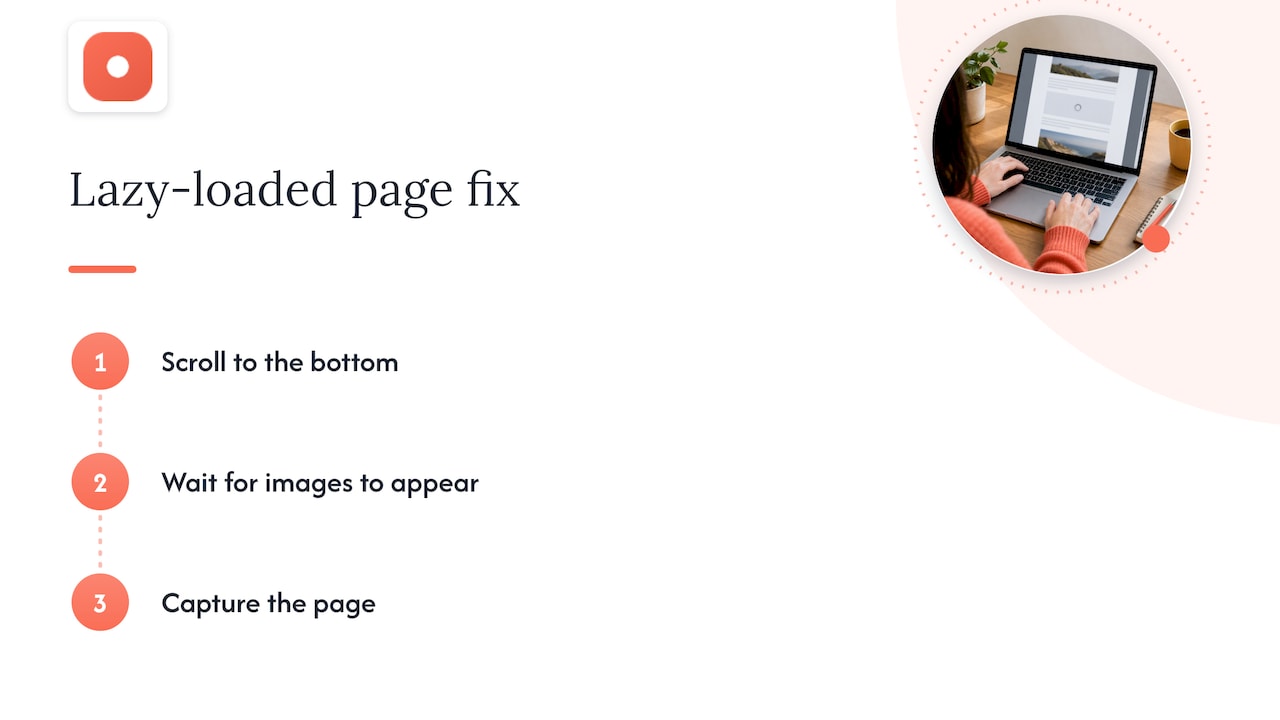
Pages with lazy-loaded content, such as infinite feeds or image galleries, only load assets as you scroll. If you capture immediately, the lower part can come out blank or show loading spinners. Scroll to the bottom manually first, wait for images to appear, then capture.
Repeating headers and floating widgets
Sticky headers, floating chat widgets and fixed navigation can appear several times down a stitched image. The most reliable fix is to close pop-ups, dismiss cookie banners and hide persistent widgets before you start. Some advanced extensions compensate automatically, but a clean page is the safest bet.
The wrong width
A full-page capture reflects your current window size, so a narrow window gives you the mobile layout. If you are documenting a specific breakpoint, check your viewport first. A screen resolution checker that shows CSS pixels, viewport and device pixel ratio tells you exactly what the browser is rendering, which helps when two people disagree about what they saw.
Huge file size
Very long pages produce very tall PNGs. Some apps and email clients struggle with them. Sharing a link instead of attaching the file avoids the problem, which is the next topic.
Automated capture
If you need screenshots generated by a script, for example in test pipelines, that is a different job. Chrome’s Headless Chrome shell documentation covers it, and notes that the original headless mode launched in Chrome 59. For human review, a manual capture is simpler.
Capturing is half the job: getting feedback on the image
A full-page screenshot of a landing page might be several thousand pixels tall. Send it in a chat and the replies look like this: “The section near the middle, the second one, no, the one with the blue button.” Everyone scrolls, guesses and misreads.
The native tools do not solve this. DevTools and most capture extensions give you a file, but no annotation, redaction or cloud storage for collaboration. Feedback then spreads across email, chat and meeting notes.
A better flow looks like this:
- Capture the page (DevTools, an extension, or Capture from URL).
- Upload it to a review tool.
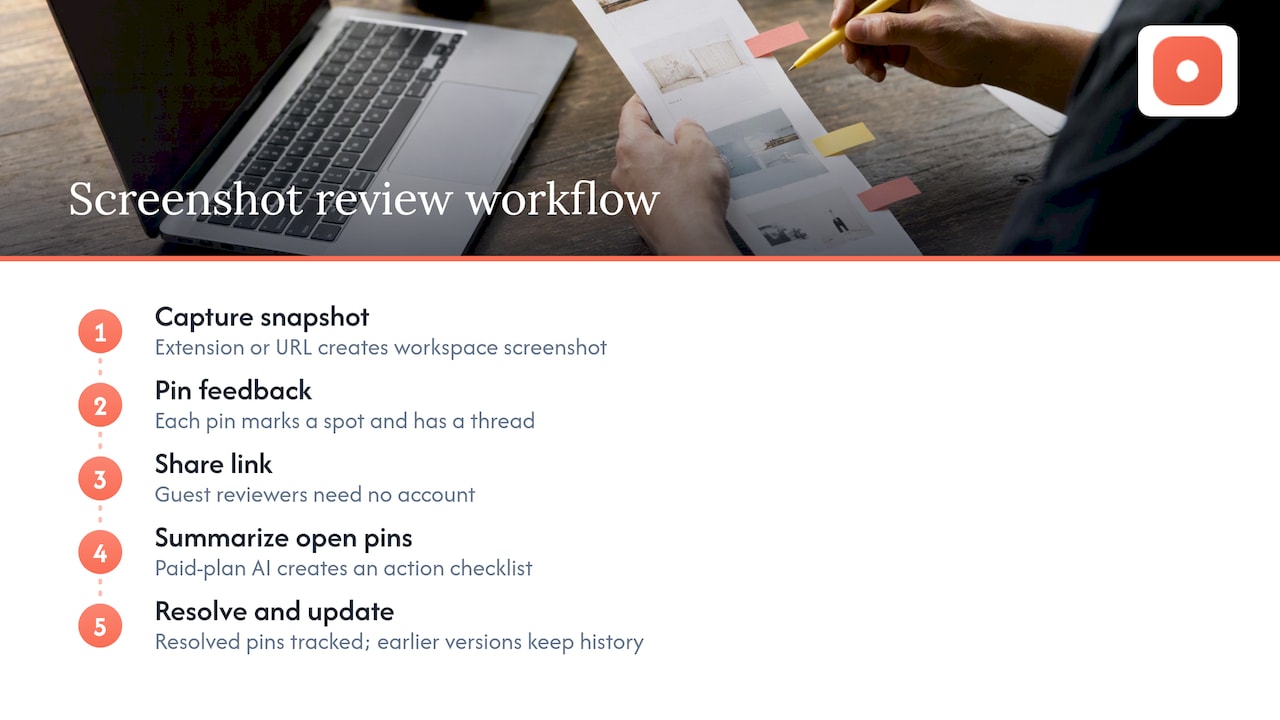
- Pin each comment on the exact spot it refers to.
- Share one link so reviewers can reply in threads.
- Resolve each pin as the change is made.
Our guide to annotating screenshots fast and clearly goes through the annotation side in more detail, and how to annotate a website for better team collaboration explains how captured pages fit into team review.
Our point of view: a screenshot should start a conversation
We build Pinhub for teams that review visual work with people outside their company: clients, stakeholders, QA colleagues. The same pattern shows up again and again. Capturing the page is not the hard part. Getting precise, organized feedback on it is.
So we treat the scrolling screenshot as an input, not an output. A page captured with the Pinhub Chrome extension or Capture from URL becomes a screenshot in your workspace. From there, you pin a comment on the exact spot, and each pin carries its own thread. Open pins stay tracked until someone resolves them, and when you upload a new version of a screenshot, the earlier versions keep their history.
Two boundaries are worth stating plainly, because they affect how you plan your workflow. Pinhub works on screenshots, images and design files, including web pages captured into screenshots. It does not annotate a live website, and it does not install a script or widget on your site. You review a snapshot of the page, which is often what you want: everyone looks at the same frozen state, even if the live page changes tomorrow.
For reviewers, the share link is the point. They open it, click where the problem is and type. Guest reviewers do not need an account, and a link can be password-protected on paid plans. When feedback piles up, an AI summary turns the open pins into an action checklist. That is on paid plans too.
— Pinhub
A practical workflow for reviewing a long page
Here is how a designer, marketer or QA tester might handle a full landing page review from start to finish.
- Prepare the page. Scroll to the bottom so lazy-loaded images appear. Close the cookie banner and any chat widget.
- Capture it. Use DevTools for a quick one-off, or use the Pinhub Chrome extension or Capture from URL on Pro or Team for repeat work.
- Check the width. Confirm the viewport matches the layout you want reviewed.
- Pin the feedback. Put each comment on the element it concerns: a headline, a button, a misaligned image.
- Share one link. Send it to the client or stakeholders. If the page is not public yet, add a password on a paid plan.
- Work through the threads. Resolve each pin when the fix ships.
- Re-capture after changes. Upload the new screenshot as a new version, so you can see what changed.
For developers and QA teams, the same flow works for visual bugs: capture the broken page, pin the exact spot, and hand the developer a link instead of a description. Our point and click feedback guide for designers and QA covers the steps in more depth.
Which Pinhub plan covers which part of this workflow
Pricing below is as published on usepinhub.com.
| Plan | Price | Members | What matters here |
|---|---|---|---|
| Free | $0 | 1 | 3 active screenshots, unlimited guest reviewers, 1 collection |
| Pro | $19/month, or $15/month billed yearly | Up to 3 | Capture from URL and the Chrome extension, Figma import, password-protected links, AI summaries, version history |
| Team | $39/month | Up to 10 | Everything in Pro, plus Slack |
| Team | $79/month | Up to 20 | Same, for a larger group |
| Team | $129/month | Up to 50 | Same, for the largest tier |
Team pricing is a flat price per tier, not a fee per person. Free is a good place to try pinned comments on an uploaded screenshot. Capturing pages from a URL or with the extension, along with password protection, AI summaries and version history, belongs to the paid plans.
Try it on your next page review
If you already capture full-page screenshots and then chase feedback through email threads, move the second half into one place. Start on the Free plan to upload a screenshot and pin comments with a guest reviewer, then move to Pro or Team when you want page capture, password protection and AI summaries. You can see the plans on usepinhub.com.
FAQ
How do I take a scrolling screenshot in Chrome without an extension?
Open DevTools, then the Command Menu, type “screenshot” and choose Capture full size screenshot. Use Ctrl+Shift+I and Ctrl+Shift+P on Windows, or Command+Option+I and Command+Shift+P on a Mac. Chrome downloads a PNG of the whole rendered page.
Why is my full-page screenshot cut off or blank in places?
The usual cause is lazy loading: content below the fold has not loaded yet. Scroll to the bottom first and let everything appear. If the page scrolls inside a panel or iframe, DevTools may capture only the visible portion, and an extension is more likely to work.
Can I take a scrolling screenshot on a phone?
Yes, but with different built-in tools. According to ZDNET, desktop, iPhone and Android each have their own method, so the desktop steps above do not apply.
Can Pinhub comment directly on a live website?
No. Pinhub works on screenshots, images and design files. You capture the page into a screenshot with Capture from URL or the Pinhub Chrome extension on Pro or Team, then pin comments on that screenshot.
Do reviewers need an account to comment?
No. Guest reviewers can comment through a share link without creating an account, and the Free plan includes unlimited guest reviewers.
Sources
- What’s New In DevTools (Chrome 59)
- What’s New In DevTools (Chrome 89)
- How to take full-page screenshots in Chrome on any device, ZDNET
- How to screenshot on Chrome (+ a full page screenshot), Zapier
- Headless Chrome shell, Chrome for Developers